Earlier this year I joined Anglian Potters. This was recommended to me by a fellow ceramicist and was well worth it! The site includes local clay dumps, events and workshops, and holds a huge network of potters situated in the surrounding area.
They have an exhibition every year at Emmanuel College, including the work of 65 different potters. I will be exhibiting some of my work with them from 15-30th August so please do come along if you're in the area and have the chance.
After a visit to the Sainsbury Centre in Norwich I was inspired by the vast range of ceramic work they had in their collection. I was particularly attracted to the piece, Mediterranean Sculpture (Orphic Dream), by Jean Arp, 1941.
This image was the best I could find online, as I only took a couple of sketches at the time, rather than a photo, but the piece that I saw was made from terracotta clay and was burnished to such a high standard that it could have passed for pink marble. I really like the idea of a piece being a completely different material than first perceived.
I was also intrigued by how the various artists on display in the centre, including Hans Coper, utilized the plinth and incorporated it in to their piece. The elevation seemed to give the form a greater sense of being. It seemed to make the piece more valuable with a greater sense of power.
A lot of my 2D work uses flat, brightly coloured, graphic, blocky shapes. The sculptures I was looking at appeared to do just this, but in 3D. These were all points I wanted to investigate and explore.
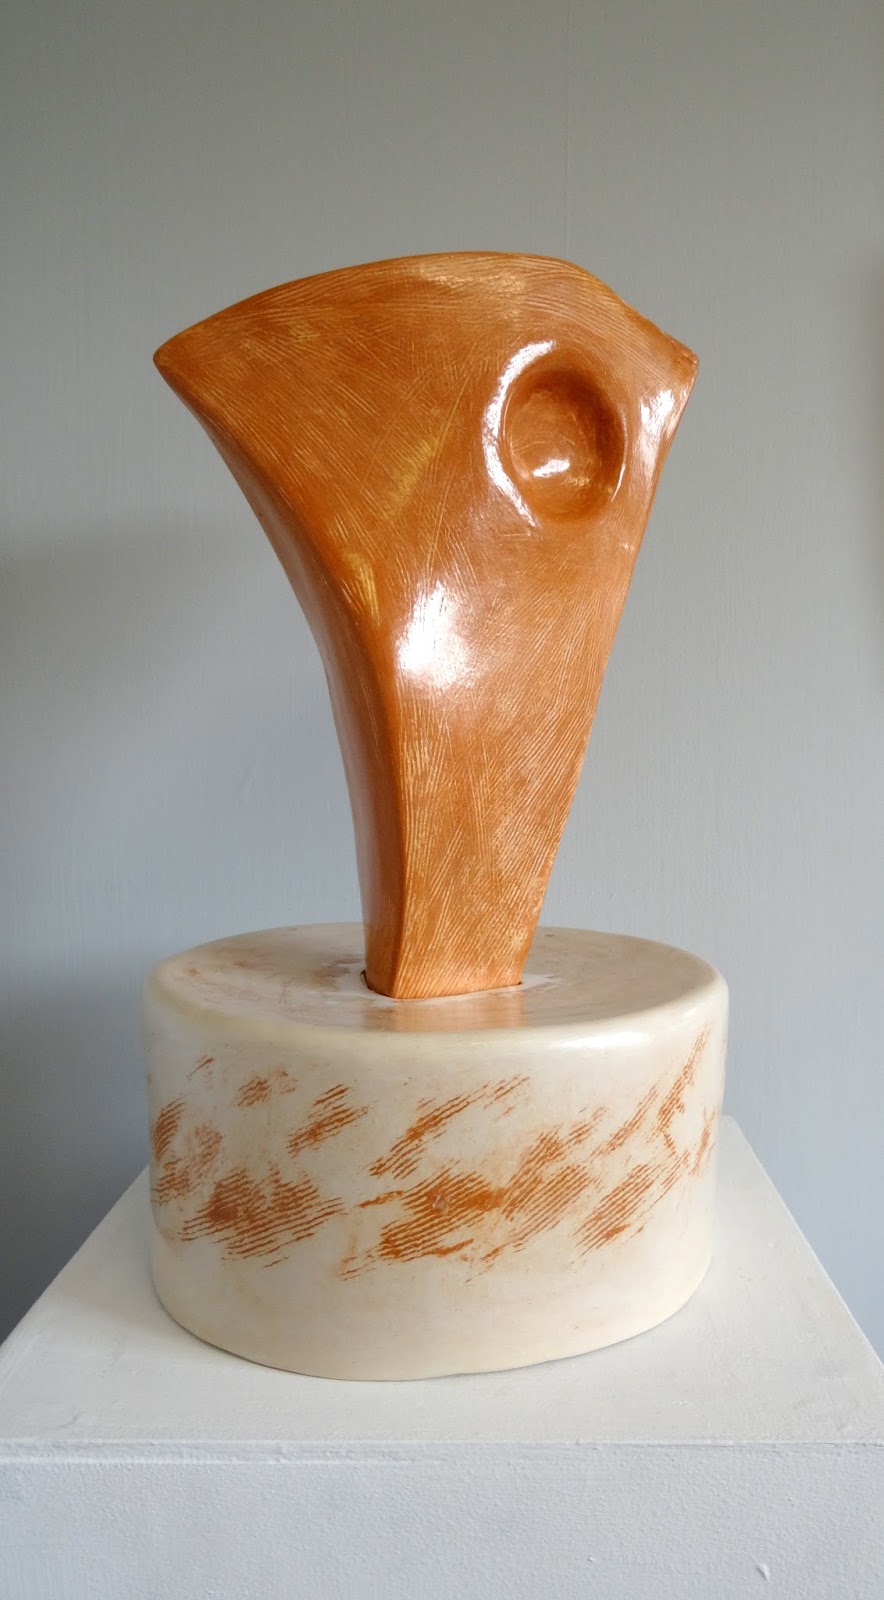
This is what I made.
As the piece gradually took shape I used a serrated steel kidney to initially smooth and join the clay. I noticed that the marks left by the kidney were very gestural and could illustrate some of the making process to the viewer, so I decided to fill them with white slip so they would remain visible and become a feature of the sculpture. The base was made from grey clay with red slip in-laid in to the surface, vice versa of its passenger.
I would love to some how map my fingerprints on this piece, as it has had a hell of a lot surface contact with them to achieve this high shine!
Here are some snaps of a vase I made recently. I used the traditional techniques of coiling to make this, along with slip in-lay for the decoration on the outside and mixture of oxides on the inside.
The rim of the pot has been trimmed to an organic shape, as the piece is intended for decorational use. During the Ceramics lessons that I teach, I try to draw my students' attention to the rim of their pot, as this informs the viewer of what to expect from the piece. If the rim is irregular, this could indicate that the pot is decorative, where as if the piece was made for drinking from the rim would be smooth and constant, as the user would be expected to put this to their lips. It can also give an indication of the weight of the piece.
As always, comments and suggestions are greatly appreciated! Let me know what you think!
We just finished setting up for the opening of my first ever solo show: BALANCE.
In this exhibition I have mixed geometric shapes with bright colours to bring my playful and experimental approach to the viewer, in an attempt to rejuvenate traditional methods and techniques, showcasing a range of intaglio and relief printmaking processes, alongside a handcrafted collection of ceramic work.
Inspired by the transition of art escaping and challenging the standard constraints of the frame and the conventional gallery space, The Makers' Gallery, Cambridge, offers the ideal setting to provoke this conversation, developing from within the artwork and the exhibition area.
Details
The Private View will be on Friday 17th April, 7-9pm, so please do drop in if you can!
I've started working more and more with ceramics due to what's been readily available to me.
My most recent creation is the jug that I will show in this post. My aim was to combine a range of techniques to make a functional item. I wanted to keep the strong graphic approach I show with in my prints, using bold colours and shapes.
When building the jug I used pinch pot, coil and slab building techniques. I decided to make simple surface decoration by in-laying coloured slip. When the jug was at the leather-hard stage of drying, I sketched on my design, and used a lino cutting tool to incise the design in to the surface. I then filled these lines with the coloured slip and when that was dry I scraped it back, so it was flush with the surface level.
I wanted to highlight the features in the form of the jug through the slip in-lay design, as well and try to keep and show a balance with in the piece.
This post is moving slightly away from Printmaking, but I wanted to include this update on the arty happenings of the summer!
This July I was given the opportunity to teach the Ceramics Summer School at Hills Road Sixth Form College. I showed a group of 5 adults a range of techniques and how to use them over the five days. We studied pinch pots, coils, slab building, throwing, slip decoration, press moulds, air traps, glazing techniques, the use of oxides, burnishing and the possibilities of combining glass with ceramic work, to name but a few!
I really enjoyed working with the small group, as it meant each student got lots of attention and encouragement, which made it possible for them to achieve some really great outcomes. They were also really open and responsive to experimentation, and using it to inform their progress over the course. Each person paid attention to the various tutorials they were shown, but it was interesting to watch how they all took my advice in completely different directions.
The 5 day course was split over 2 weeks, with the weekend in between, as I made use of this time to bisque fire the work. Wednesday, Thursday and Friday in Week 1 were days allocated for making. We were very lucky with the hot sun outside, which helped to dry the work, ready for it's first firing.
When the students returned on Monday I taught them various glazing techniques, which they were then free to get started with, and continue the following day.
Here are some pictures and videos taken throughout the course (courtesy of Emma Wilshaw).
Slab built sculpture inspired by the work of Richard Deacon, made from a paper tenplate.
A wind-chime made from pinch pots to be strung together to make a jointed fish after glazing
Alex working on a slub built sculpture
A birdbath made from a press mould, drying out in the sun
Helping Alex construct her piece
Pouring glaze and dry-brushing oxides on the bottom of the birdbath to the left
Glass feature in the bowl of the birdbath after it's final firing
A little cat bowl by Carys
Pam's collection of owls making use of low temperature, brush-on glazes
A bowl made in a press mould by Carys making use of glaze and glass as form of decoration
This month my piece, '3 Pillars', was selected for the Cambridge ArtWorks Ltd. Open Call For Entries Exhibition 2014. It was open to the public during the middle two weekend of Open Studios (12th and 13th, 19th and 20th July). A little thumbnail of my work even made it on to the poster for the show!
The exhibition looked really strong and I always enjoy a nosey round the artists' studios at this light and airy location.